When a universal joint fails once, it’s a warning. When it fails twice, it’s a system problem—one that bleeds uptime and budgets. The good news: repeated U-joint failures follow patterns you can diagnose without guesswork. The bad news: those patterns hide in angles, torque, and tiny installation details that get rushed when trucks are hot to return to service. Let’s unpack the silent culprits behind repeated U-joint failures and the fixes that actually stick.
Understand how U-joints Work
At its core, a U-joint transmits torque through a cross supported by needle bearings riding in capped trunnions. Under load, the cross must stay flooded with grease. The needles must roll (not skid), and operating angles must be small and complementary. An excessive angle makes the cross accelerate/decelerate twice each revolution, driving heat into the bearings.
Add contamination or poor lubrication, and those needles' flat spots, the cap frets, and repeated U-joint failures show up like clockwork. If your failures cluster on the same axle or position, you’re looking at a consistent, correctable stressor—not bad luck.
Driveline angles and ride height: the geometry behind repeated U-joint failures
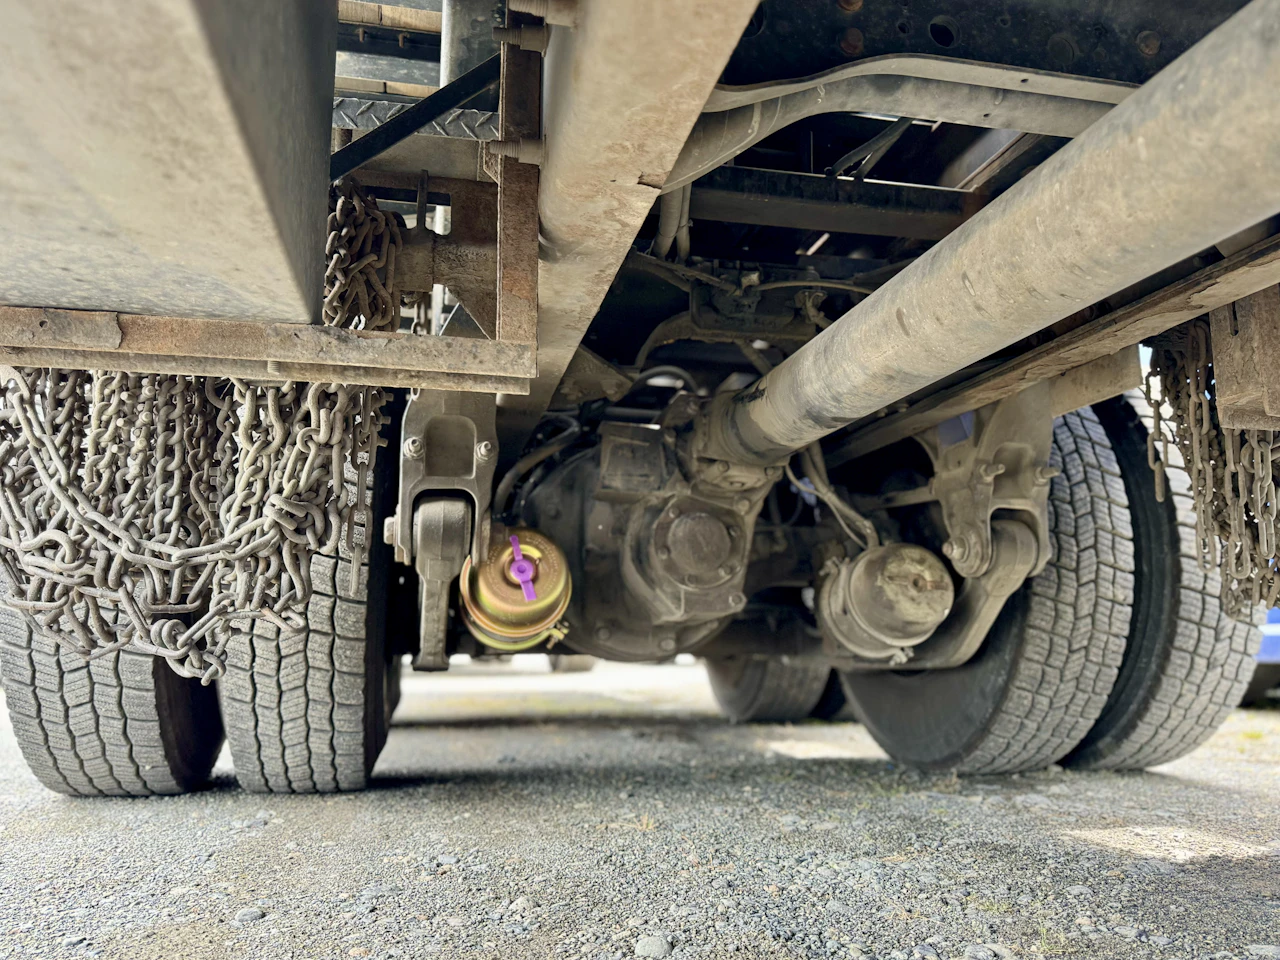
Nothing kills U-joints faster than wrong working angles. A lifted or sagged suspension, collapsed air springs, or a shimmed axle can push the transmission output, shaft, and differential pinion out of harmony.
Ideally, front and rear working angles are small (often 1–3°) and within a few tenths of a degree of each other so the velocity fluctuations cancel out. If the pinion points too high, you’ll cook the rear joint; if the carrier bearing height is off, you’ll punish the middle joint on a multi-piece shaft.
Measuring true angles with an inclinometer—not eyeballing—often cracks the case on repeated U-joint failures that seem “random.”
Lubrication, seals, and contamination: the quiet assassins
Grease is both a lubricant and a coolant for U-joints. Miss intervals or use the wrong spec and heat wins. On greaseable crosses, purge until clean lube appears at all four seals; if a cap never purges, that trunnion is running dry already. Power-washing, salt brine, and quarry dust force grit past tired seals, turning needles into grinding pins.
Sealed “lifetime” joints can survive harsh service, but only if angles and balance are dialed—otherwise they cook with no chance for rescue. Many repeated U-joint failures trace right back to starved caps, contaminated grease, or mismatched lube across the fleet that undercuts bearing film strength.
When the Hardware Itself is the Problem
Swap enough joints into a worn yoke and you’ll keep losing them. Bell-mouthed yoke ears, out-of-round cap bores, and stretched snap-ring grooves let caps spin, cut seals, and walk. Excess runout or bend in the tube makes the joint “fight” every rotation, and imbalance hammers the needles until they brinell.
Don’t forget the slip: a dry or notchy slip yoke locks axial movement, shoves thrust into the U-joint, and accelerates wear. Before condemning the joint again, blue-dye the bores, mic the ears, and check tube runout and balance—small, measurable defects often sit at the heart of repeated U-joint failures.
Installation Pitfalls: Phasing, Torque, and Snap Rings
Even perfect parts die early if they’re installed wrong. On multi-piece shafts, yokes must be in phase so the front and rear working angles cancel; one spline off and you’ve built a shaker. Over-torqued strap bolts ovalize caps; under-torqued bolts let them fret.
Wrong-thickness snap rings or rusty grooves prevent true cap seating, pre-loading a trunnion and starving needles of grease. Mark phasing before disassembly, clean grooves to shiny metal, measure snap ring thickness, and torque with a calibrated wrench. Shops that standardize those steps see repeated U-joint failures fall off a cliff.
Field Symptoms That Point to the Root Cause
- Vibration throttle that eases on coast: excessive working angle or imbalance, often behind repeated U-joint failures at the rear joint.
- Vibration worsens with load and speed: tube runout or lost balance weights beating on the cross.
- Hot cap after a short drive: starved trunnion from blocked grease passage or spun cap in an egged yoke.
- Rapid cap rusting or milked grease: pressure washing or brine intrusion past failing seals, leading to repeated U-joint failures in winter.
Fast Diagnostic Checklist Before You Install
- Measure transmission, shaft, and pinion angles with an inclinometer; record and compare.
- Check carrier bearing height against spec; shim to restore parallelism.
- Inspect yoke ears for bell-mouth and snap-ring grooves for stretch; replace if out of spec.
- Check tube runout and balance; straighten/rebalance if needed.
- Verify phasing marks, snap-ring thickness, and torque specs before road test.
- Purge grease at all seals; if a cap won’t take grease, replace the joint—don’t hope.
- Confirm slip yoke travel is smooth and lubricated to prevent thrust-loading.
This quick routine catches 90% of patterns behind repeated U-joint failures before the truck leaves the bay again.
Operations and loading: how Usage Patterns Drive Repeated U-joint Failures
Start-stop routes, heavy PTO time, and low-gear yard jockeying spike torque reversals that bruise needle bearings. Over-capacity loads twist the cross beyond intended limits, especially if traction control is pulsing brakes on slick surfaces.
Drivers who clutch-dump or apply harsh throttle at full lock add angle and shock at the same time—bad combo. Training matters: smooth launches, straight-line throttle when possible, and avoiding power hops keep joints alive. If a specific route or driver sees repeated U-joint failures, operational coaching can save more joints than any part swap.
Preventive Playbook that ends Repeated U-Joint Failures
- Standardize grease type and intervals; audit purge at all four seals.
- Add driveline angle checks to seasonal PM, especially after suspension work.
- Replace suspect yokes; don’t “make it fit” with oversize rings.
- Rebalance shafts after tube repair, dent, or U-joint replacement.
- Verify phasing and torque with documented procedures at the bench.
- Lube slip splines with the correct moly grease and confirm travel.
- Log failures by position/vehicle to spot patterns early.
This regimen turns one-off fixes into durable cures—and makes repeated U-joint failures a rarity.
Closing the loop with data
Track every repair with angle measurements, torque values, parts batch numbers, and photos of phasing marks. Pair that with vibration analysis on chronic offenders to catch imbalance and runout before they chew another cross. Over a quarter or two, the trend line is obvious: fleets that measure and document see the cycle of repeated U-joint failures fade, while fleets that “just replace the joint” keep feeding the same fire. Data doesn’t just tell you what broke—it tells you why.
Remove the Root-Cause for a Driveline Audit
If your shop is swapping the same joint every few months, you don’t have a parts problem—you have a process problem. End repeated U-joint failures with a measured approach: angles checked, yokes gauged, shafts balanced, and installs documented. National Fleet Management can blueprint your driveline from nose to tail so the fix outlasts the truck. Book your driveline audit today and stop letting U-joints dictate your downtime. For more information on keeping your fleet in peak condition, read our article on why preventive maintenance extends longevity in trucks.

